How to revise with an Edit Letter: Part 3

Are you still with me? Because Part 2 can be pretty brutal if you have an extensive edit on your hands and you may think you’re never going to survive to see the light of Part 3. But you will.

For me, I cut about 10k words and then added back about 5k. I combined chapters, adjusted character motivations and added a few new chapters.

All in all, once I started revising (after all the planning stages), it took me about 8 weeks to finish (I have a full time job and 3 kids though, so that definitely contributed to the time).

So how do you know that you’re finished revising?

Well if you followed the previous steps, you’re going to have all these:

IMG_4233
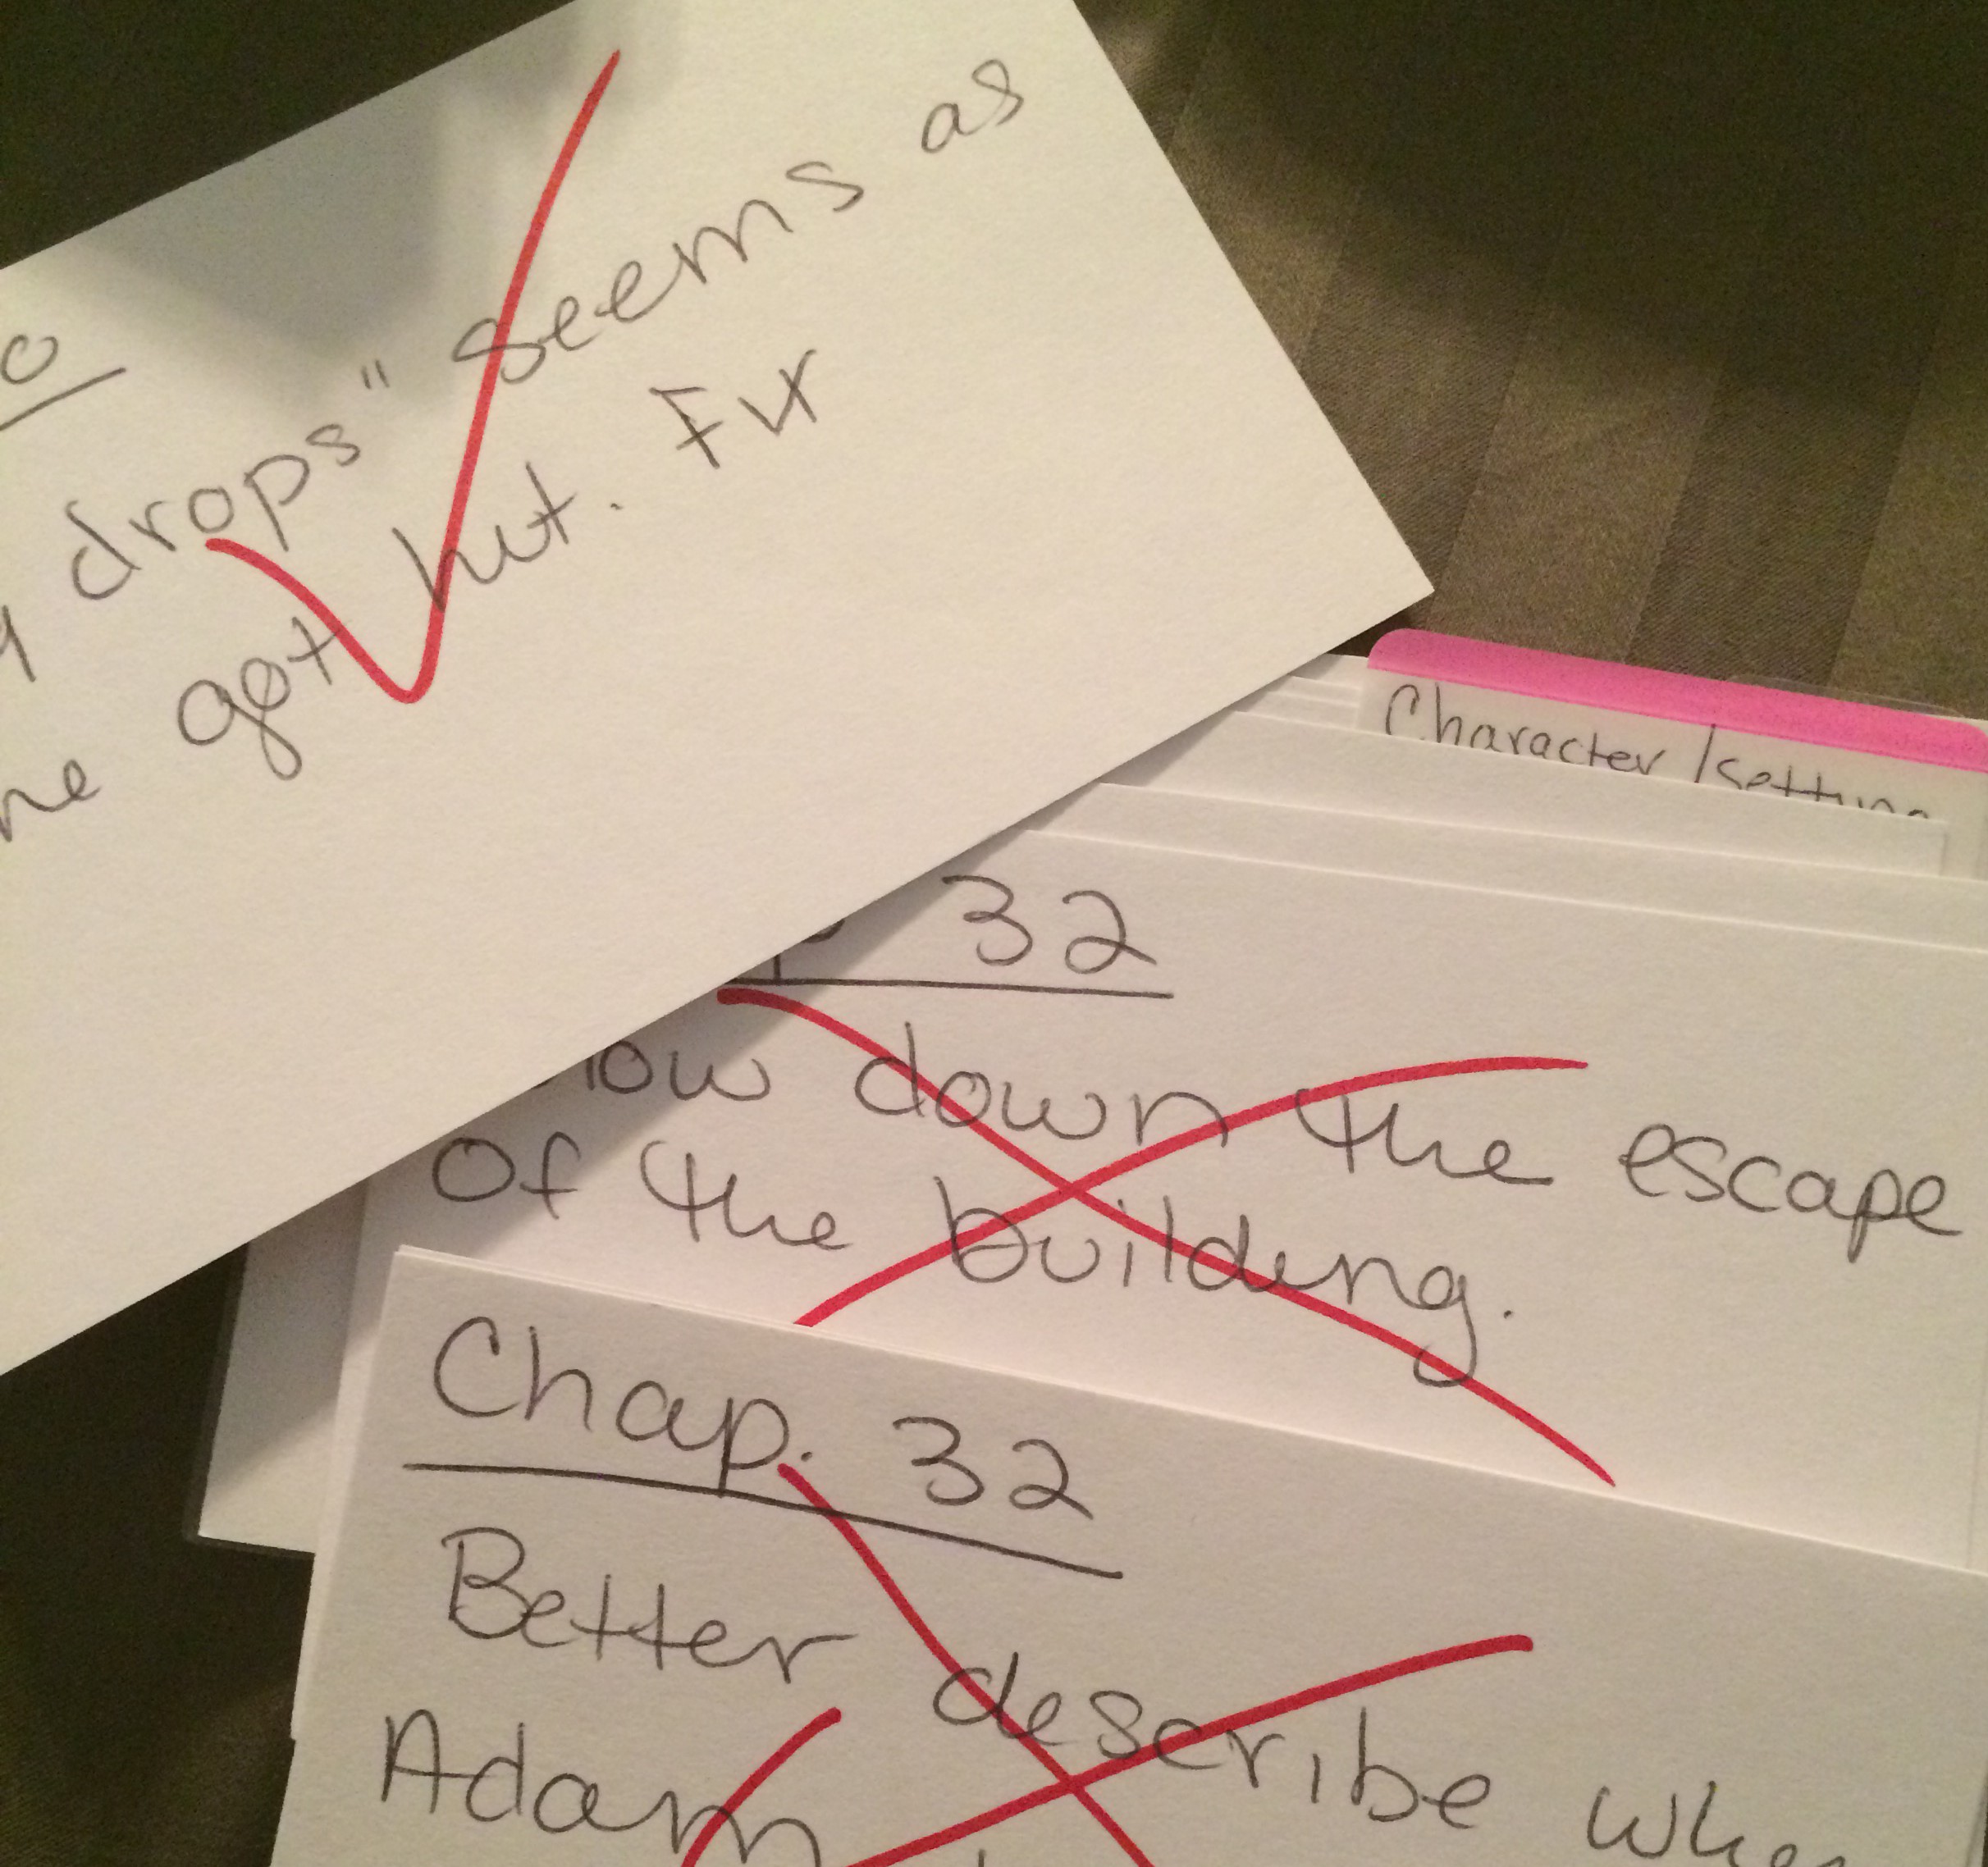
that should now look like this:

IMG_5547

I then printed out a fresh copy of my edit letter and went through with a highlighter. Everything that I did already I highlighted in green and everything I still needed to do, I highlighted in yellow. If you your pages are almost entirely filled with green, you’re almost done. If they have a lot of yellow, you still got some work to do!

IMG_5549
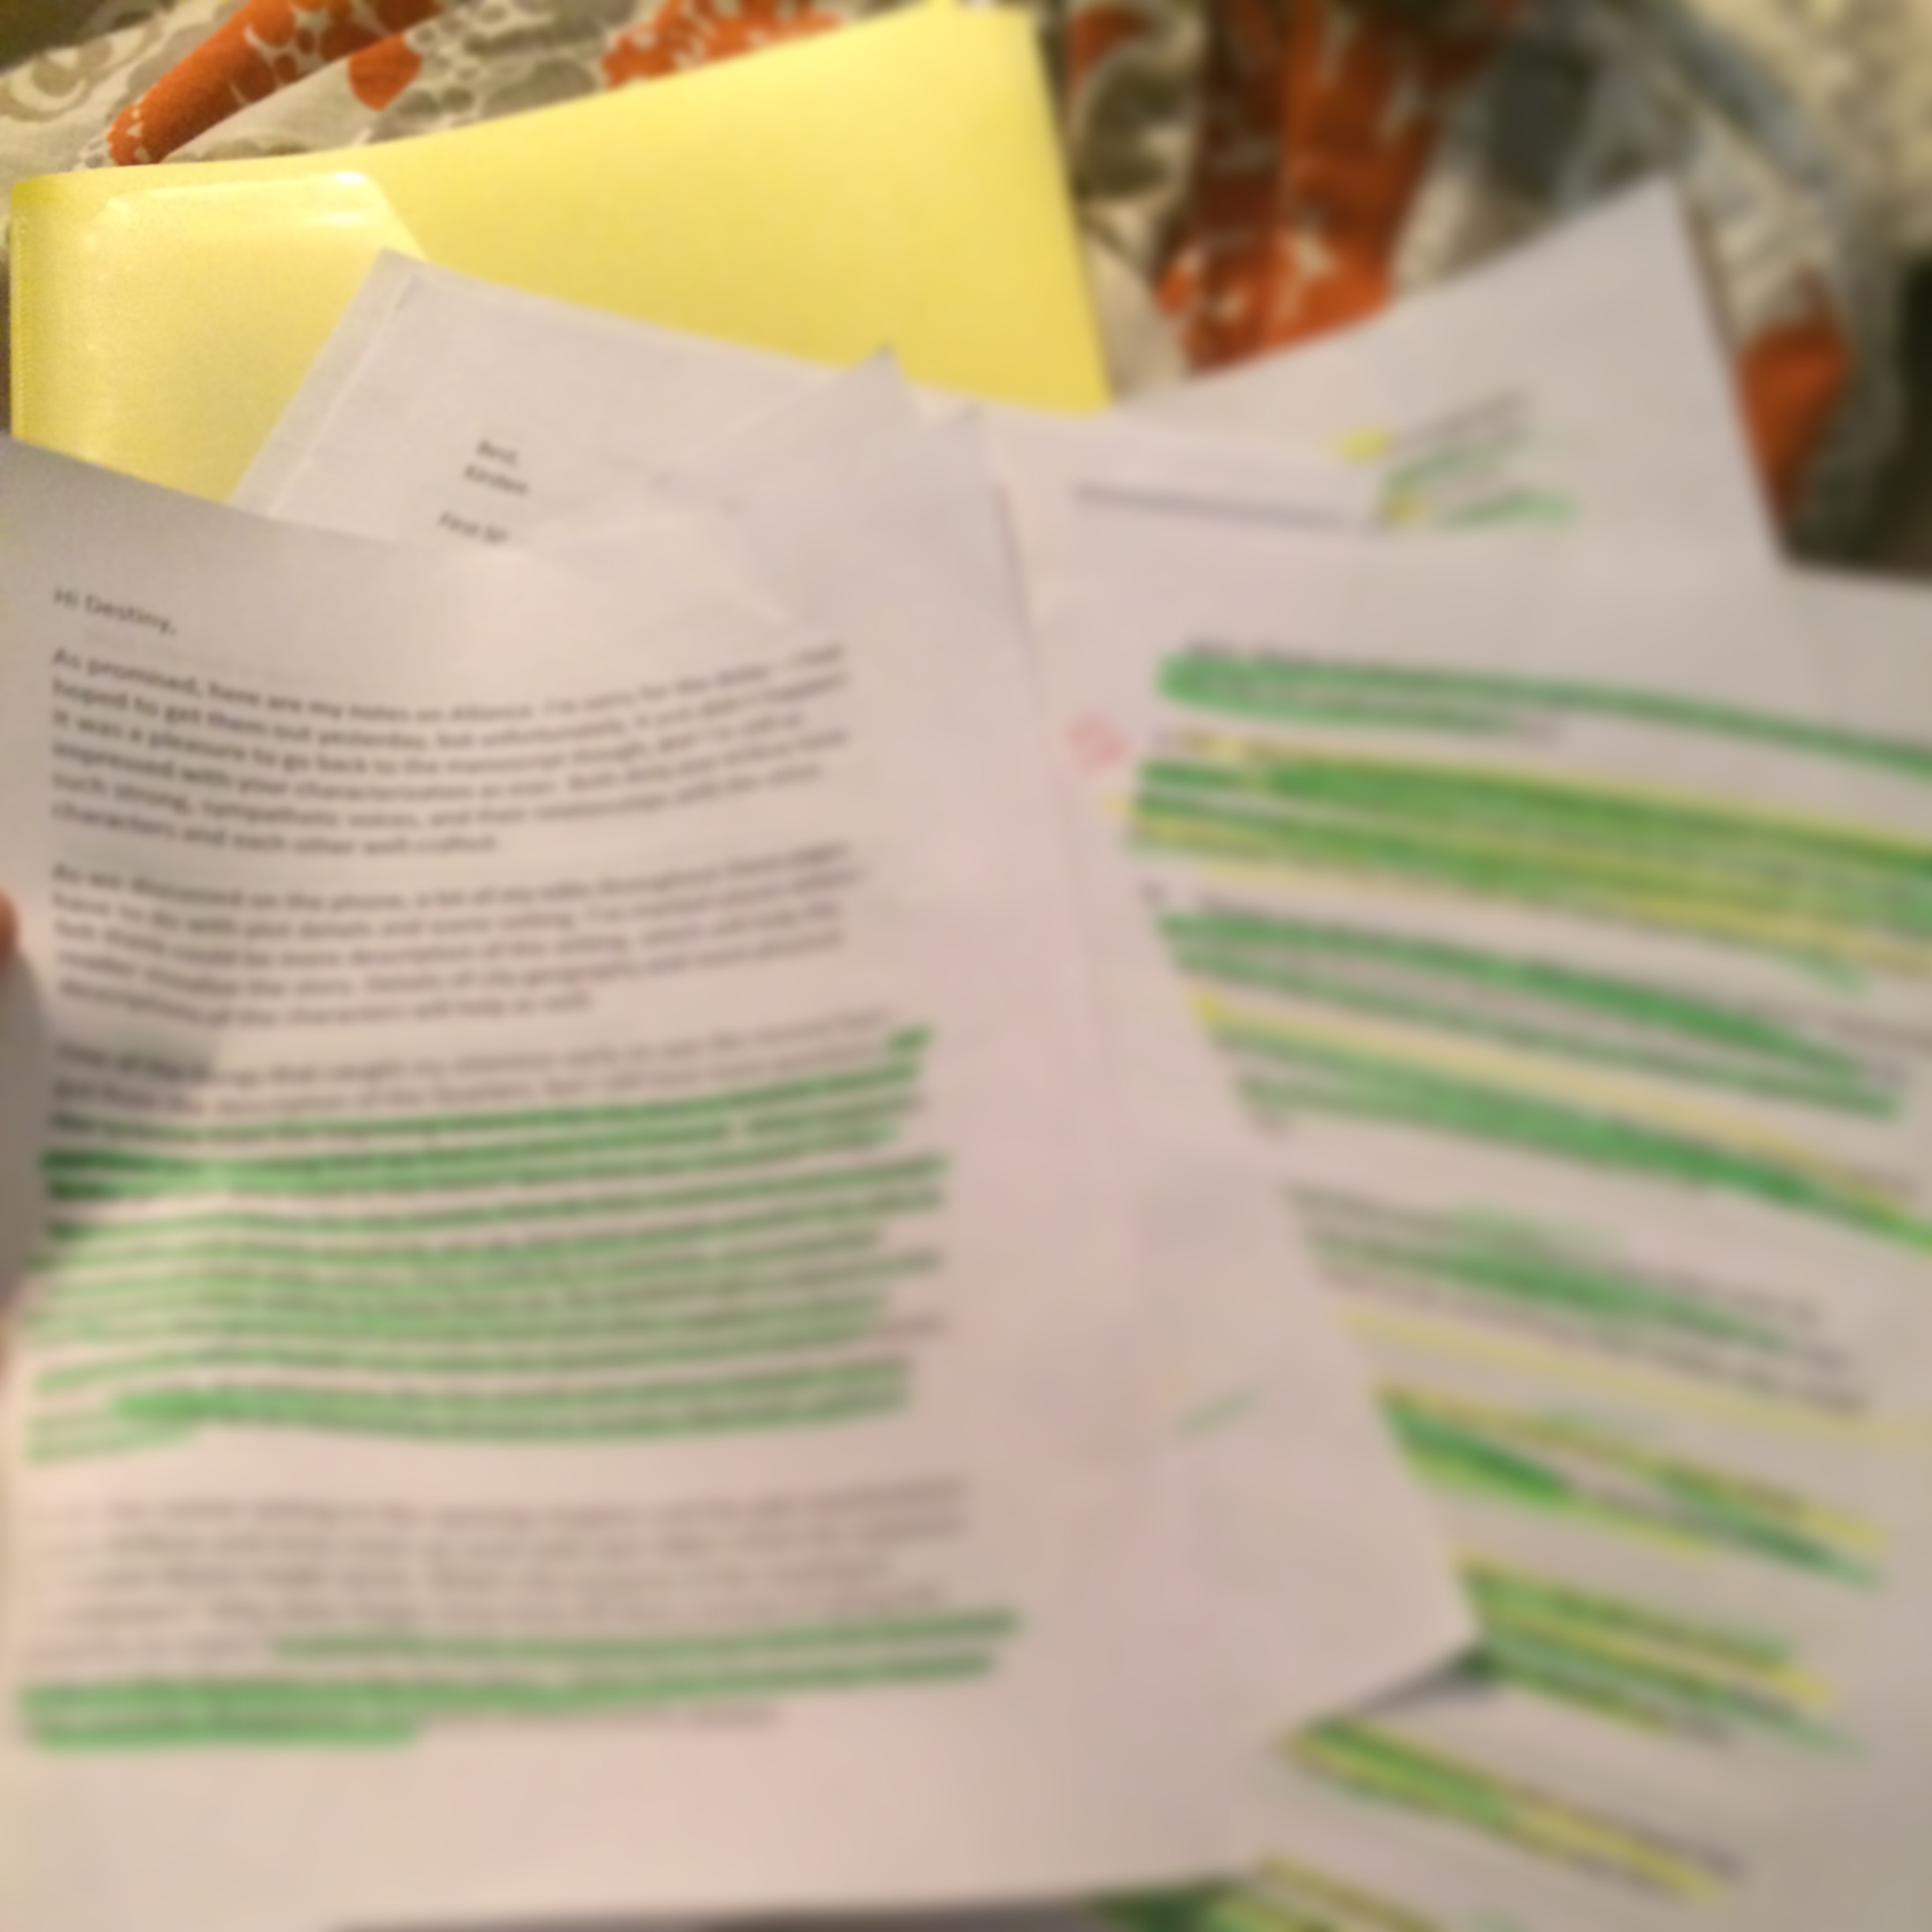
I had some yellow, so I went back through and fixed it note by note until all my yellow was then scribbled in green. It was quite the colorful few pages!

So you’re done with all your notes!

The first thing you need to do is celebrate because THAT my friend was not easy. It was time consuming and mind bending and there were more times that you thought about setting your manuscript on fire than you would care to admit. I bet the LAST THING you want to do right now is ever look at it again… but guess what? We have a part 4.

Technically part 4 would be to do a read-through from beginning to end, but that doesn’t warrant it’s own post so Part 3 (b) is READ THROUGH YOUR ENTIRE MANUSCRIPT. If you can, print it out again. If you can’t, send it to your e-reader. The whole point is that you’re not allowed to fiddle with it when you read. Just make notes.

Part 3 (c) would be to then implement those notes.

You know what you have now? A pretty solid revised draft. At this point you can either

  1. Send it straight to your agent/editor
  2. Send it out to your CPs

If you did some major revisions that affects the majority of your book, I advise if at all possible to send a first revision to your CPs so they can give you some perspective. Your draft you send to your agent/editor will be much stronger because of it. If it’s just a few chapters, just send those few chapters to a CP. The point is that you might think you nailed it, but another perspective might show you have a few more tweaks to go.

Well I hope this helped! Let me know if you have any questions I can answer in more detail.


How to Revise with an Edit Letter: Part 2

If you’re following along, you’re going to want to make sure to do Part One of the revision process before you tackle this section. So after a week full of snow days and cabin fevered kids and husband (who was undoubtedly worse than the kids), Gv7vqZs it took me longer to get to phase two of my revision plan than I expected. But alas, I finished the next step. This is called the notecard phase. This is when you go through all the notes you made on your character/plot/setting pieces of paper and turn each one of those into a notecard with a corresponding chapter. Then I went through my edit letter from my agent and made individual notecards for her notes too. In the end, my table at Barnes & Noble looked like this and I had over a 100 cards: IMG_4233 80% of my notecards were plot related, but then I did have some that were character related as well, which brought on some character worksheets that I didn’t originally think I was going to do. I ended up creating in-depth bios with 3 minor characters that probably won’t make it into the story, but will absolutely affect the way I write them. I needed a better handle on their motivations and this is the best way to do that. I did it freehand and just sketched out their lives. It doesn’t have to be pretty, because it’s not going in the book. It’s just for you to get to know your character more. In doing this, one of my characters is changing a lot, which I like! Your notecards will be detailed and you’ll have several for each chapter, so just put them in chronological order. Or sometimes your notecard will just be you telling yourself this section sucks and you can do better: IMG_4232 Then I got all my notecards and organized them and put them in a nifty little box because I’m awesome like that and get a weird pleasure out of seeing things in order. This urge for order is unfortunately compartmentalized just to the professional side of my life and does not lend itself to house cleaning, but wouldn’t it be awesome if it did? I would basically be a super hero. IMG_4234 So that concludes the getting organized section of the revision process! Now on for Phase Three… the fun part when you get to actually start revising on the page! 🙂

How to Revise with an Edit Letter: Part One

My fabulous agent Kirsten did not miss a beat and just days after signing me, she spit out a pretty epic edit letter.

I’m not going to lie, when I read it I had a mixture of feeling like this:

tumblr_mz98x2mhUl1r187pho1_500

and then this:

tumblr_inline_ml1s70CYEA1qz4rgp

She had some very specific things she’d like to see addressed and although they aren’t huge, they are the kind of changes that have ripple effects. In other words, the first half of the book is going to get a pretty serious overhaul.

So how do you even begin to tackle a revision based on an edit letter?

Here is what I decided to do, part one.

First off, don’t do anything for a day or two. Keep reading the edit letter and start revising in your mind. I’m serious about this one. Just stew on it for a day or two.

For practical purposes, I pulled my revision plan together from three sources: the venerable Susan Dennard who’s writing advice is beyond amazing, Beth Revis who’s writing guide Paper Hearts is a must read for all writers and then one of my CPs Alexa Donne who has some pretty kick butt blog posts on revising.

The first thing I did was print out my entire MS and put it in a binder (though it’s also fun to get it bound!) I was trying to save on paper/printing costs, so I shrunk it down to 10pt font and put it in single space. That helped cut down the pages printed by over half. I could do that because I wasn’t actually looking to revise on the page, but just read.  I’m sure you could do this just by reading on your computer or maybe transferring it to your Kindle, but I wanted the option of scribbling on the page and I also revise a lot by hand. (Note: you’ll also need to revise your novel in 10pt/single space at the beginning because you’ll want your notes to match up, so keep that in mind.)

Screen Shot 2015-02-24 at 2.16.45 PM

I then read my edit letter probably 10-15 times. I wanted to get her suggestions down deep so that as I was reading through, I would know what to look for without having to reference the letter. The same goes for the plot/setting things she pointed out as well.

Then I had a separate blank sheet of paper for every main character (and plot relevant minor character) as well as a page for plot problems and setting problems.

As I read through my entire MS, I was looking for areas where I could deepen a character POV, flesh out a reaction, make the characters fuller. Instead of marking the manuscript, I would just mark it on the corresponding sheet. With plot/setting, I was looking at where I needed to implement my agent’s suggestions and would mark it down on the sheet. I also would mark paragraphs/dialogue in the MS that I didn’t like with “re-work.”

For example, on my plot page, I would write: “On page 47, get rid of “Roger” character and replace with Liam to tie in better with the Initiative.” For a character, I would write down, “Soften the Senator’s reaction on page 6, give him a moment where he is kinder to Willow in this scene.”

Note that I didn’t actually do any revising yet, I just plotted out on a broad scale where I would revise things.

So that is part one!

I’m writing this blog series as I go, so I’ll know what worked and what didn’t.

Up next on my plan? NOTECARDS 🙂

Nudging with an Offer of Representation

In light of so much good news happening with #PitchWars, I thought it might be great to do a post about nudging with an offer of representation!

There are tons of resources for this, which is where I pulled my info from (mainly HERE and HERE), so I’m not going to re-invent the wheel here and have nothing profound to add. I think one of the best posts on this is Dahlia’s, so go there for more detailed info!

What I will say is that nudging is exciting and dreadful at the same time.

I loved Kirsten, but I knew that I needed to be respectful of the other agents (and I had read over and over that agents don’t like it when you accept rep without giving them a shot to read/offer). Even then, those 10 days felt like SOOO long!

But it also feels good to finally put someone else on a deadline after languishing in the trenches with only vague time references on when you’ll hear back 🙂

Nudge for an agent who has your full:

Hi AGENT!

Thank you again for your interest in MANUSCRIPT. I just wanted to let you know that I’ve had an offer of representation and I’ve told the offering agent that I needed until DATE to consider.
If you’re also interested, could you please let me know your thoughts by DATE? 
Thank you so much!
Nudge for an agent who has your partial:

Hi AGENT!

Thank you again for your interest in MANUSCRIPT. I just wanted to let you know that I’ve had an offer of representation and I’ve told the offering agent that I needed until DATE to consider.
If you’re interested in continuing reading, could you please let me know your thoughts by DATE? I have attached the full for your convenience.
Thank you so much!
(P.S. This might be a little presumptuous to attach the full (I got contradicting advice on this), but I figured, why the heck not? If they are interested, it will save a back/forth, if not, they would have passed regardless.)
Nudge for an agent who has a query only:
Hi AGENT,

I know you may not have seen this query yet, but I wanted to reach out to you because I received an offer of representation today. I told the offering agent I’d get back to her/him by DATE so if this query seems like something you’d be interested in representing, I can give you until then with the full. However, I completely understand that you may not be able to rush.

Thank you for your time and consideration.
Gentle deadline reminder nudge:
Hi AGENT!
I just wanted to check in to see where you’re at with MANUSCRIPT and if you needed anything else from me. I really appreciate your taking the time to look at my MS, particularly on such a sped-up timeline.
(You may feel totally comfortable with just waiting until the last day and hoping all the agents remembered your deadline. I’m too much of a control freak and would rather get instant step asides than just never hear back, so I sent this last reminder 2 days before the deadline. An agent who is really interested is going to remember to get back to you, so this is honestly unnecessary, but writers are a paranoid bunch! In the end, every agent who told me they would get back to me, did.)
Best things about nudging?
  1. They don’t say “pass/reject” they say “Step aside” 🙂
  2. Your inbox is dinging a lot and it’s exciting
Bad thing:
  1. Getting a lot of rejections in a short amount of time. That’s not fun for anyone, even with an offer on the table. It can weirdly affect your confidence so you need to have a good group of support around you and keep reading your emails with the offering agent to remind you that you and your book are awesome! 🙂
  2. If you get another offer, having to tell someone who loves your book and believes in you, that you are choosing a different agent. That sucks. No getting around it and you’re going to feel bad about it, even if you love your chosen agent and have no regrets.
Random:
Some agents will ask who the offering agent is. Tell them! It’s definitely not something you need to keep a secret. I wouldn’t offer it up in the initial exchange, but if they ask, there’s no reason not to tell them.

Tips For Writing a Dual POV

Okay, so I’m not an expert by any means, but before my massive revision I had one resounding note from people who read my book.

“The dual narrative voices were too similar”

tumblr_n52hdnO8Oa1rjygs9o2_400

Ugh.

How disheartening because they were SO incredibly distinct in my mind. Writers can attest that you know your characters and of course know their “voice” so when that is not portrayed on the page, it’s difficult to know where to start.

Yet when I went back and started revising… you can guess it… the further into the book it got, the more similar they sounded.

tumblr_n52hdnO8Oa1rjygs9o4_500

Here are three tips I picked up while revising:

1. At the beginning, exaggerate their voice. I went back through and revised my male character and probably went overboard on everything from curse words to slang and whatever to differentiate. I needed to get in a rhythm of his voice and figure out how he would say the things he was already responding too. He’s not going to say “what was that?” he’s going to say, “What the hell?” He’s not going to wax on poetically in his internal monologue, he’ll be more dry, but also intense. In my effort to differentiate and set his tone, I accidentally made him wildly misogynistic. Oops! Had to rein that one back in 🙂 After I went overboard, I revised all his chapters back down to make him more realistic and relatable, but overall it really helped to establish his voice.

2. Revise one POV at a time. In my novel it was basically an every other chapter kind of split (though it did vary) and so I would ONLY revise one character POV at a time. So that would be revising chapters 1,3,5… and go all the way to the end. Then I would start back over at 2,4,6… This helped me SO much in keeping in the “head” of my character.

3. Read your chapters out loud. This is particularly useful when you are having voice issues. You just may realize that they are sounding more similar. Also, while reading out loud, tweak as you go rather than go back.

Extra:

If you’re writing YA, pretty much make sure you only use contractions (aka: it’s rather than it is). This helps establish voice in YA characters and can be used to differentiate voice as well.

So these are a few things I picked up while trying to differentiate my dual POV! Hope these help!

tumblr_mswqeiFScb1s0gbgco2_500